


Hello Bird readers!
What a joy to be trading spaces with Daniela today. When you're done here, head over to NewlyMynted to see what she's got for you. It's like Two for the Price of One awesomeness!
With Valentines Day just around the corner, many of us are trying to decide what to get our significant others. For me, this is a real challenge. My honey, Logan, is a computer technician, so getting him anything related to computers is out of the question. I know how to use mine, but don't ask me about the mechanics behind it. He does, however, love it when I make him things! And if there's one thing men certainly appreciate, it's a practical gift. With that, it became a question of what gift DIY gift for men could I create? Recently Logan was promoted to management and received business cards with his name on them. Yeah, I'm a little proud of him!
Supplies:
Leather or other fabric
Pelon fusible interfacing
Sewing machine
Sizzix Big Shot & embossing folder (optional)
Computer
Xacto knife
Martha Stewart acrylic paints: Wedding Cake and Gold
Sponge brush
Fine tip paintbrush

Cut your main fabric and interfacing as follows:
Main 4" x 4 3/4"
Pockets (x2) 4" x 2 1/4"
NOTE: FITS STANDARD 3.5" X 2" SIZE BUSINESS CARDS
Trim your interfacing down 1/4" on all pieces and iron onto the back of each of piece of fabric. You can ignore my coffee stains. Being an avid DIY'er and coffee drinker has its set backs.

This is where things get exciting. Logan got me this pretty little number for Christmas, and imagine my surprise when I found out you can emboss fabric. You heard me right, You Can Emboss Fabric! Yes I squealed! To keep this masculine, I went with a simple quarter foil embossing folder I picked up at Michael's. Run it through according to your machine's directions, and revel in the sheer awesomeness of this discovery. Is that not one of the neatest things you've done in all your crafty days?!

Using a quarter (or other small round object), trace a half circle and cut it out of each of your pockets. This will create a little thumb hole to make it easy to pull a card out. My advice, though, be smart and measure the center of your pockets. I did it the lazy way and eyeballed it, and my cut-outs didn't come out centered. Oh well. There is no room for perfection in creativity, am I right?

With a long straight stitch, sew across the top of each pocket first with a 1/4" seam. Since this is a leather fabric that won't fray I left my seams exposed.
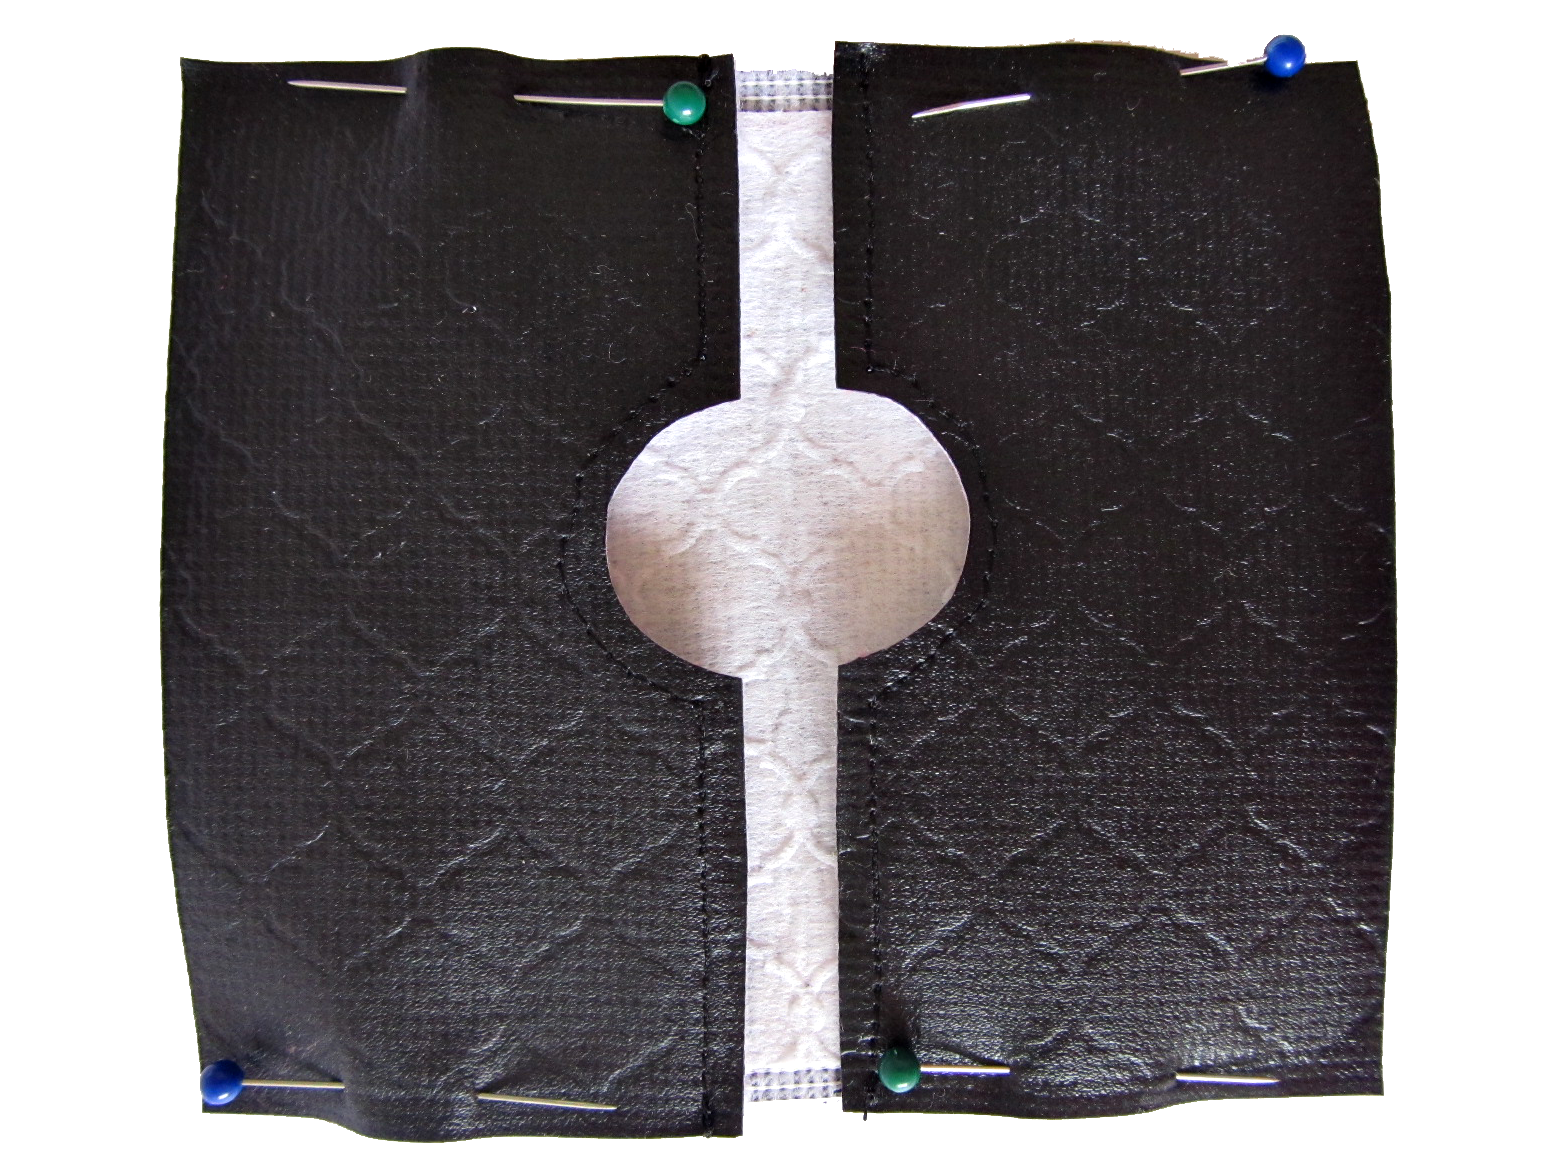
Pin the pockets to the main fabric wrong sides together and sew around all four sides, also with a 1/4" seam.

Open a Word document and select what monogram font you want. I used Go to the Sky, but here is a great selection of many more. Make sure your document's zoom is set at 100% so you can get an exact size of what it will look like when you print it out. Mine was 1 1/4". Once it's printed, use your Xacto knife and cut away the negative space.

Tape the stencil you just made to the front of the card holder and paint. Be sure to dab only in up and down motions. If you turn your sponge to the side, paint will get shoved underneath and your lines will become uneven. Two coats is best, but if you're like me and lack the patience to wait an hour between coats, break out your hair dryer. It's a multipurpose tool!

With your fine tip paintbrush, line your letters in white and dry again. And that's all. In an hour you now have a custom Valentine's gift for him. I can't wait for the 14th to come around to give him this. Last year I made him a leather Bible cover and he adores it. It brings him so much joy to show off the things I take the time to make for him.
Thanks for having me, Daniela! I would love to hear from each of you:
*********************************
Ok - are you as impressed with Stephanie's tutorial as I am? Who wouldn't enjoy receiving that gift? I hope my husband doesn't read this -- he will be super jealous, ha ha. Thanks to Stephanie for visiting! Like she mentioned earlier, I am over at Newly Mynted sharing a tutorial for DIY Coasters, but not the typical photo or tile kinds. Be sure to head over there {click here!} to see what I used to make my hand painted ones {spoiler alert: it might include a lot of burlap!}.

xo

Enter the fab giveaways I'm currently hosting!


You can follow my Pinterest boards here:

what cute idea. :)
ReplyDelete:)
ReplyDelete