photo PABOI2.jpg

Weekly Digest

 photo PAGEShome1.jpg  photo PAGESlinkparty1.jpg  photo PAGESfeatured1.jpg  photo PAGESsponsor1.jpg  photo PAGESguestposts1.jpg

Search This Blog

Showing posts with label burlap. Show all posts

Monday, April 28, 2014

Pink Polka Dot Birthday Wreath

Happy Monday! Guess what? We moved last Saturday! Well, not everything, but we loaded up a 26' U-Haul and moved most everything out of our house and into a storage unit. It's so weird to see basically your entire life all piled up in a 10x15 cement space. We will move the rest this Saturday (and by "the rest" I mean just our beds!). My husband is gone almost this entire week for a work trip, so I'm kind of on my own to finish up. The appraisal on our house is Wednesday, and there are a few minor repairs from the home inspection and maybe a couple more from the appraisal, since it's FHA. Selling a house is definitely an adventure, and I truly hope we never have to move again. This week is going to be CRAZY - I just know it - but I'm super grateful to have my little Avabean to hang out with the whole time and make time for reading her new book from Grandpa's trip to England ("Peppa the Pig Meets the Queen") and eating lots of Chick-Fil-A, of course. :) What are you up to this week? Anything wild and crazy or exciting? Or just the same ol' same ol'? Which is truly a blessing, too!

Today, I've got a fun wreath tutorial for you that includes my 2 craft faves: POLKA DOTS + BURLAP. I could probably do a roundup of polka dot + burlap crafts from my own portfolio and fill up an entire blog post - I've done so many! Hopefully you aren't tired of polka dots + burlap yet. ;) I made this wreath for Ava's 1st Birthday last December. It may have stayed on my front door through Christmas, and New Year's AND Valentine's Day. My > St. Patrick's Day Wreath < was the only thing that finally brought it down, ha ha. This little ol' wreath is very simple & easy (classic Put A Bird On It, right?!). My fave part? The pink balloons pretending to be bows! 


POLKA DOT & BURLAP BIRTHDAY WREATH


You'll need a wreath form {I liked this straw one, because I didn't have to worry about metal or green styrofoam showing through}, balloons, polka dot burlap wire ribbon, floral pins


Wrap the ribbon around the wreath. The one spool was JUST enough.

Wednesday, March 26, 2014

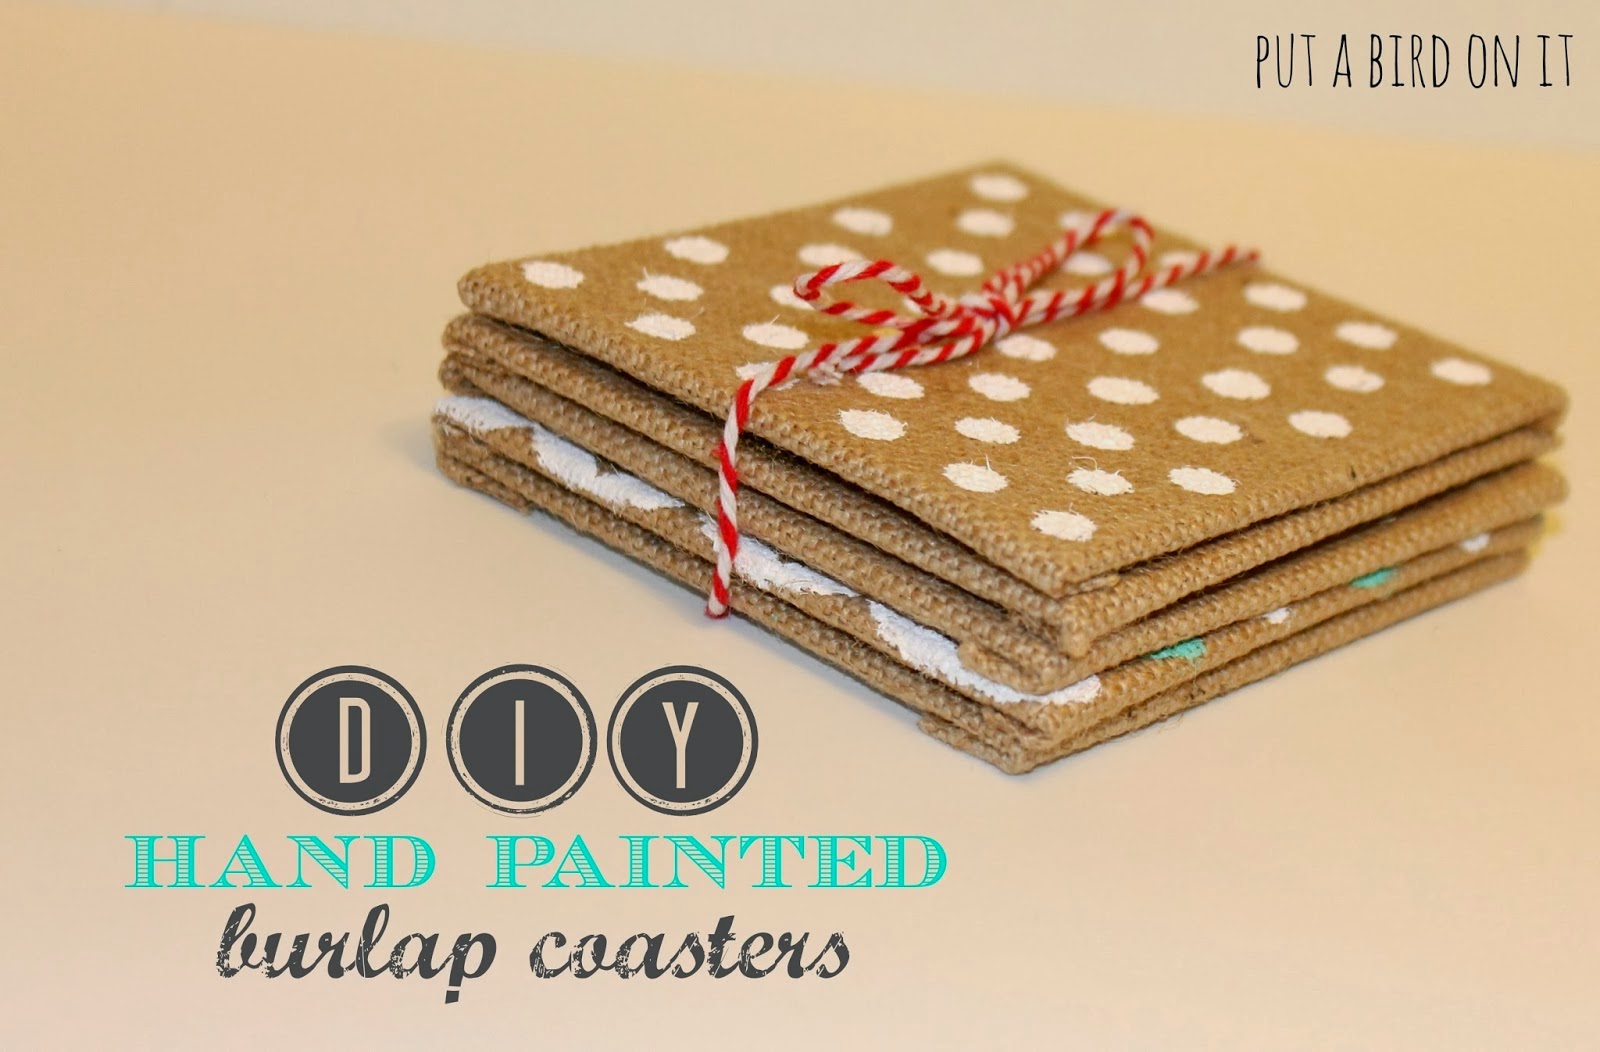
Hand Painted Burlap Coasters

Happy Wednesday! Today, I'm sharing a project I originally guest posted on Newly Mynted. I just LOVE burlap and found these burlap squares at Michael's for pretty cheap. My mind immediately went to "COASTERS!" These were fun to make - you can use any color of paint and customize them however you want. They'd be adorable as a personalized wedding gift or housewarming gift, too.


Supplies
Burlap squares
Acrylic paint
Foam pouncers | Q-tips | Foam brush {whatever you want!}
Acrylic sealer {not pictured}


This is the fun part! Decorate your coasters however you please. You can use a stencil, but I just painted by hand my designs. I think using a vinyl stencil in the future would be fun.

Monday, March 17, 2014

How to Cut Fabric with a Silhouette Cameo & St. Patrick's Day Wreath

HAPPY ST. PATRICK'S DAY!!

ARE YOU WEARING GREEN?!


Ok, I just love holidays! Even if I don't go all out celebrating them every year. Nope - no St. Patrick's Day mantel or treats at my house! Bad craft blogger - I know. :) But I try to do something for each holiday. I did make Shamrock Cupcake Toppers last week {click HERE for the tutorial!}. I also made an easy, last minute St. Patrick's Day Wreath for my front door. I did it in under 30 minutes Saturday morning while my lovies slept in {"lucky" them!}. I took my polka dot birthday wreath {HERE} and upcycled it into this little number. Best part of my project? Cutting fabric with my Silhouette Cameo! Even bester part? I got a NEW CUTTING MAT! I've been cutting with an old, non-sticky mat {think painters tape being used to hold down my card stock! boo}. It was a DREAM cutting fabric with my new mat and my Cameo. Total dream. I cut this adorable white shamrock fabric into pennants for the banner on my wreath. On to the tutorial!

> PIN IT <

Supplies

Fabric  | > Interfacing <  |  Iron  |  Scissors  |  Silhouette Cameo & Cutting Mat

The Fun Part

Monday, February 3, 2014

Guest Posting at Boughtin Baby {DIY Polka Dot Burlap Wreath}

Well, friends, I am visiting another blog today! Remember the adorable onesies Ava got to where a couple weeks ago from Boughtin Baby & Bride? I am over there, at Cady's blog, sharing the pink polka dot burlap wreath I made for Ava's 1st birthday party. It was really easy (of course!) and extremely adorable, IMO, so make your way over there to read all about it! My favorite part? Turning balloons into bows! 

To get you excited...here is a peek at what you'll be learning to make!

Click HERE to view the tutorial!


xo


Tuesday, January 7, 2014

DIY Burlap & Polka Dot Canvas {quote & photo display}


Hey y'all! A couple months ago, I guest posted on Best Day Ever. I shared my Burlap & Polka Dot Canvas ... a cute way to display your favorite quotes and photos. I realized I hadn't yet shared it here on my own blog! So today's post is the tutorial for making your own Burlap & Polka Dot Canvas. Enjoy!


This quote display is super versatile! You can easily switch it up for each season by adding a festive quote.


the how-to


What You Need
10x10 Burlap Canvas {Mine's from Walmart ($8!)}
Circle Foam Pouncer
Acrylic Paint in your choice of color
Clip
Glue Gun
sawtooth hanger, if you want to hang it

The Fun Part
 There are only two steps.
1} Using the foam pouncer size you love the most, daub on your polka dots {use an up-and-down motion}.
2} After it is dry, hot glue your clip to the front of your canvas.
*The End*
Ok, there is a 3rd step. If you want to hang your display, attach a mini sawtooth hanger to the back. I got mine from Target for $1. It looks like this:

This is quite possibly the easiest craft I've ever done. I love displaying quotes in my home. I have pinned SO MANY. You can follow me on Pinterest HERE if you need some inspiration! Free printables are all over!

Want to download my favorite quote? I've created a FREE PRINTABLE of the quote shown in the photo, from President Thomas S. Monson - The Prophet of The Church of Jesus Christ of Latter-Day Saints.  


xo

FACEBOOK  /  INSTAGRAM  /  TWITTER  /  PINTEREST


******************************************

Enter to win Ad Space on my blog for the month of April! Click HERE!

You may also enjoy


Monday, November 18, 2013

Burlap & Polka Dots Quote Display *GIVEAWAY*

Happy Monday!

Today, I am excited to share my easiest craft ever.

But you can't find it here!

Nope. I am GUEST POSTING on Best Day Ever!

Head on over for a full tutorial and chance to WIN one of these cute quote displays with a 12-pack set of my favorite quotes.

Happy Monday!


Printables by A Step in the Journey and Simply Kierste
 
Love the quote I'm displaying from President Monson? Click the link below to download for FREE!


Free Printable - President Monson Quote


*Want to PIN an image for later? Hover over any photo on my blog and the PIN IT button will appear in the top left corner!*

Wednesday, August 21, 2013

One Frame --> 2 Ways!

If I said:

"Give me one Dr Pepper and I'll give you back a Dr Pepper and a bag of peanut butter M&M's,"

You would say:

"Heck yes!"

Right?

Of course.

So this tutorial is basically like that.


If you love Ikea, raise your hand. *raises hand*
I love their picture frames -- especially this beaded one.  Following this tutorial, you can get TWO cute display pieces out of just ONE frame, using the frame itself and the frame back w/ stand piece.

FRAME with BANNER

For this project, I took everything out of the frame and just used the frame itself.  I used Silhouette Studio to create the pennants for my banner. The background of each letter is pink toile -- which matches the curtains in the nursery. The awesome thing about using a Silhouette cutting tool is that it cuts the holes for you for hanging with ribbon or twine or whatever you choose! I used bakers twine. Then, I just taped it to the back of the picture frame. You can't see the back, so no one will see your tape. :) Voila! Project Uno.


FRAME INSERT w/ STAND AS PICTURE HOLDER
 This has to be one of the easiest projects I've ever done, and it is one of my faves! It is so simple -- which is my favorite thing about it. All you need to do is take the back piece of the frame (that has the stand attached to it) and hot glue a piece of burlap over the front. I cut my piece a couple inches wider than the frame insert, so I could wrap it around and hot glue it to the back. Again, the back doesn't have to be perfect, because no one will see it! Then, I attached a bronze mini clip to the front burlap {again, with hot glue}. That's it! I love it, because I can switch out the photo any time I want. Voila! Project Number 2.


  Well, there you have it! A simple way to take ONE frame and make it into TWO adorable ways to display your favorite banner, saying, or photo. Mine are special pieces in Baby A's nursery. :) Have fun!


Friday, July 5, 2013

Happy Father's Day Tie Wreath Tutorial {no cut!!}

Happy Father's Day!!

This year, I wanted to make a Father's Day tie wreath. I'd seen a few on Pinterest and LOVED the idea. All the tutorials were sort of the same:  get a foam wreath, cut 14 ties, hot glue to wreath. There was only one problem -- the CUTTING 14 TIES part! I don't know about you, but this girl hasn't figured out how to get her money tree to sprout in her backyard yet, so the idea of cutting TONS of my husband's precious ties was out of the question! I thought maybe - just maybe - if I could find ties at a thrift store for 50cents each, then just maybe I could spend $10 bucks on the wreath and use those ties. BUT NOPE! Apparently used ties are a hot commodity, because each store I checked, the cheapest tie was $3. One store even had a used Prada tie for $30. Again - out of the question! So I thought there has to be another way. But I couldn't find even one tutorial on making a tie wreath that didn't involve cutting the ties.

So I gave up.

On my tie wreath.

And moved on to other projects.

UNTIL -- (dun dun dun....) --

-- 
--

--

I found a 12" metal wreath form that I'd been meaning to make a mini burlap wreath with, and DING! it hit me that I could possibly use it to make a no-cut tie wreath. And it worked. Quite nicely! I threw in a gold vinyl DADS! in the middle for an extra su'm su'm (the husband's idea!), since we were hosting our family for dinner and celebrating several DADS! that night.


Father's Day Tie Wreath {no cut!}
I got my wreath and my husband got to keep his ties. Perfection.


TUTORIAL

The Goods:

1x -  12" metal wreath form
Several ties (I used 9)
Double sided tape
Ribbon or burlap for hanging

Organize your ties how you want them on your wreath. I went for blue, brown and gold tones.
With the tie facing you, as if it were on a person, wrap the small end of the tie through the wreath hole and tuck it up into the 2nd metal piece for stability.
Take the rest of the tie and continue wrapping around the metal wreath form, so the back of the tie is facing down and the front of the tie is always showing.
When you get to the end, the pointy part of the tie should be positioned so that you can place it last and have it showing on the front of the wreath. I had to tighten or loosen each tie to adjust the positioning. You may have to start over, if it isn't positioned right. After a couple, you get the hang of it. Once it is positioned correctly, place a piece of double sided tape on the back of the tie, as pictured. Then, you can flap it over and stick it to itself. Some ties may need a couple pieces of tape, depending on the material.
The finished tie should look like cute, little tie envelopes. Aww.
Continue wrapping ties until the wreath is complete!
It is seriously the easiest wreath I've ever made. AND, you get to keep all your ties.

HAPPY FATHER'S DAY!


Wednesday, August 8, 2012

I Love You Because

My sister has been seeing all those cute I Love You message boards all over and was about to buy one online, but instead asked me to make one for her. I was just flattered she thought of me and trusted her marital love expression in my piano-playing-turned-craft-making hands. I was EXCITED to tackle a crafty request - especially for my sister, but I was NERVOUS at the same time. It's easy enough to make something for yourself...if it looks bad, I can deal. But making something for someone ELSE makes me second guess every step! Hopefully we can still have our Thursday night Friends-watching-pizza-eating parties even if she doesn't like it.

Her only request was that it be big enough to write decent sized messages on and that it uses the colors BLUE & ORANGE (she's been straying from the normal 'black & red' fave...that color combo is out!). One stop at Michaels...a crafting Skype call with the BFF...and a whole lot of LOVE later...here is the final result:

Friday, July 27, 2012

Burlap and polka dots...and some inspiring words

My friend and I have this thing we do where we set goals together. Different for each of us, but we share them and talk about them. As of yesterday, we are on goal 106 {ok, slight exaggeration}.  Some are big {I will practice the piano every week}, some are small {I will have water with my lunch instead of that delicious dr pepper}, but they are meaningful to us. Some of my goals make me emotional...some come from regret...but they are there to keep me going, to keep me improving myself, and to remind me of the full potential within me. I found this quote by c.s.lewis, one of my favorite authors, and immediately fell in love with it. It is now proudly displayed in my kitchen, where I can see it every day and be reminded of the goals I've set and encourage me to keep trying {and it helps to have my latest loves burlap and polka dots, too!}.


Friday, July 13, 2012

Burlap Wreath

Burlap.  So hot right now. 

It really is!  I love me some burlap.  Following this fantastic tutorial at Top This Top That [http://topthistopthat.blogspot.com/2012/03/easiest-burlap-wreath-you-will-ever.html?spref=fb/] I created my own burlap wreath.  I kept it super simple for spring, only using some white tulips and my fave polka dot wired ribbon. 

I have been itching to turn it into a SUMMER wreath, since spring is pretty much over (ok, completely over).  To get the creative juices flowing, I turned to the husband for advice on what to use to make it summery.  I asked him what came to his mind when he heard the word SUMMER.  His reply?  "Raging Waters!"  "You could put a wave and waterslides on it..."  Ummmm...yeah...creative juices flowing?  Not quite.  I have yet to have the lightbulb go off for the summer wreath, but this 100+ degree weather is telling me it's time to change seasons.


Blog Design By Brand Me Beautiful