photo PABOI2.jpg

Weekly Digest

 photo PAGEShome1.jpg  photo PAGESlinkparty1.jpg  photo PAGESfeatured1.jpg  photo PAGESsponsor1.jpg  photo PAGESguestposts1.jpg

Search This Blog

Showing posts with label DIY. Show all posts

Friday, September 26, 2014

DIY Family Willy Wonka Costumes for Halloween

Hello everyone! I'm excited today to be part of a GINORMOUS Halloween costumes roundup! I'm getting my DIY on with Jamie Dorobek and her handmade Halloween costume site, Really Awesome Costumes, to share a one-stop-shop-of-ideas for DIY Halloween costumes for you, your family, your pets and even a Trunk or Treat idea! It's spooky good! This is THE PLACE to find your family's next Halloween costume idea for this year {and years to come!}. I highly recommend pinning this post to your Halloween Pinterest board - you'll definitely need it in the future!


101+ Handmade Halloween costumes at Creating Really Awesome Free Things


Last year, my family and I were all characters from the Willy Wonka movies. It was CHEAP and EASY! I even DIY'd a Baby Wonka Bar Costume for my little Ava. She was the CUTEST chocolate bar you'll ever see - I just wanted to munch those little wonka cheeks! I even tried RIT Dye for the first time! {see how to dye fabric with your washing machine HERE!}For the full tutorial on how to make your own Baby Wonka Bar Costume - click HERE


Here's how each costume breaks down:

DAD - "Willy Wonka"
  • Brown Top Hat
  • Flower Vest
    • I found a woman's denim flower shirt from a thrift store (Deseret Industries) - it totally worked as a "vest" {yes, it's a woman's shirt, but it doesn't look like it when Mr. Wonka is rockin' it!}
  • Purple Jacket
    • I gotta say - I totally lucked out on this one! I found a purple jacket {again - a woman's!} at a thrift store. It was a purple blazer and it worked perfectly! Just look around thrift stores and you are bound to find one that will work!
  • Bow Tie
    • My husband just used a regular brown tie of his and tied it in a bow. Perfect!
  • Cane
    • This is the crowning part of Mr. Wonka's costume. Ask a parent or grandparent if they have an old cane you can borrow. Chances are - they will say YES! And if your husband is anything like mine, he will get WAY too into playing the part once he has that cane in his hand. 
That's all you need to be Willy Wonka! Don't go out and spend a fortune on any of these costumes. You can seriously find almost everything at a local thrift store!

MOM - "Oompa Loompa"
  • Brown long-sleeved shirt
    • I had one at home, but thrift store-it up, if you don't!
  • White "puffy" pants
    • You can use white capris/pants, if you have them, or go thrifting! {are you seeing how most items are being thrifted??} I found some white baggy sweat pants that worked perfectly!
  • White suspenders
    • I bought a pair like this from Amazon {super cheap!}
  • Green hair
    • I was miss boring head and didn't color my hair green. Next time, I probably will! You can get an "oompa loompa" wig off Amazon for $15, or use green hair spray to color your hair. Even without the green hair, everyone knew what I was!
There you have it! Congrats! You're an oompa loompa now. I recommend learning the songs, so you can break into song and dance randomly {and whip out those killer midget dance moves you've been hiding!}.

BABY - "Wonka Bar"
  • Wonka Bar Outfit
    • Click HERE to view how I made my Wonka outfit for Ava! You could use a baby onesie, instead of the sleeper like I used, and paint the Wonka logo or use heat transfer. In my DIY tutorial, I dyed a sleeper brown and used my Silhouette Cameo to cut vinyl for a Wonka stencil, then used fabric paint to color it in. Check it out!

That's all there is to it! With just a little thrift store shopping and some scrumpdiddlyumptious imagining, your family can get Wonky with it this Halloween. I can't wait to see how YOU customize your Wonka costumes! Link back here - I'd love to see photos!

Now - get in on the 88+ action by clicking on the links below to see how my fellow bloggers DIY'd their own super creative Halloween costumes! Holy cow - I basically have to PIN them all! Be sure to follow the Handmade Halloween Costumes Pinterest Board for lots more Halloween inspiration.
88+ Handmade Halloween costumes at Creating Really Awesome Free Things

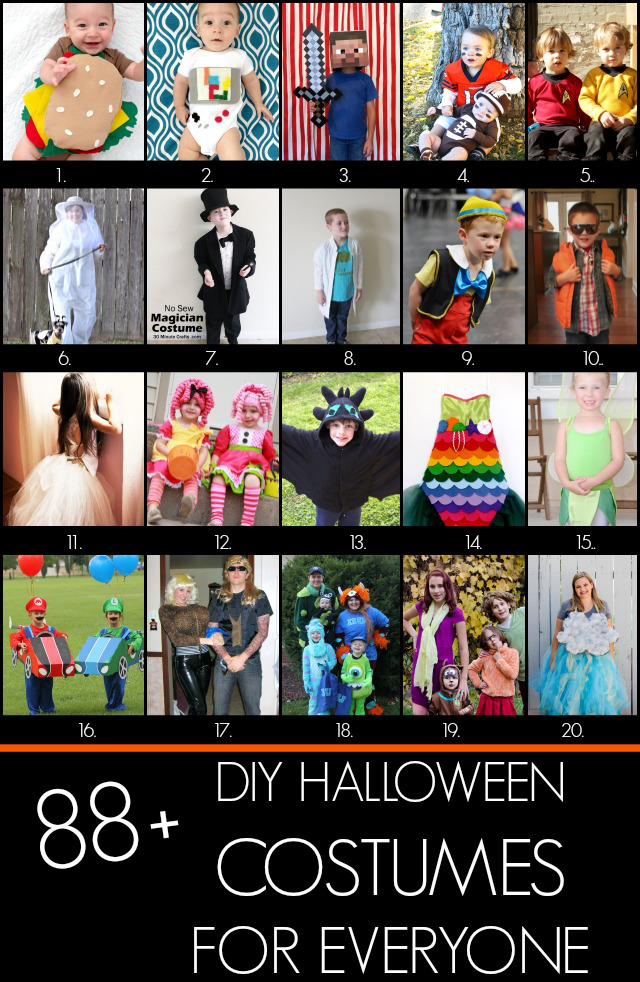
14. DIY Mermaid For Less Than $20 (No-Sew Option) 15. Easy Tinker Bell Costume 16. Mario and Luigi Go Kart Costumes 17. Dog The Bounty Hunter and Beth 18. Family Monsters University Costumes 19. Scooby Doo family costumes 20. DIY Storm Cloud Costume
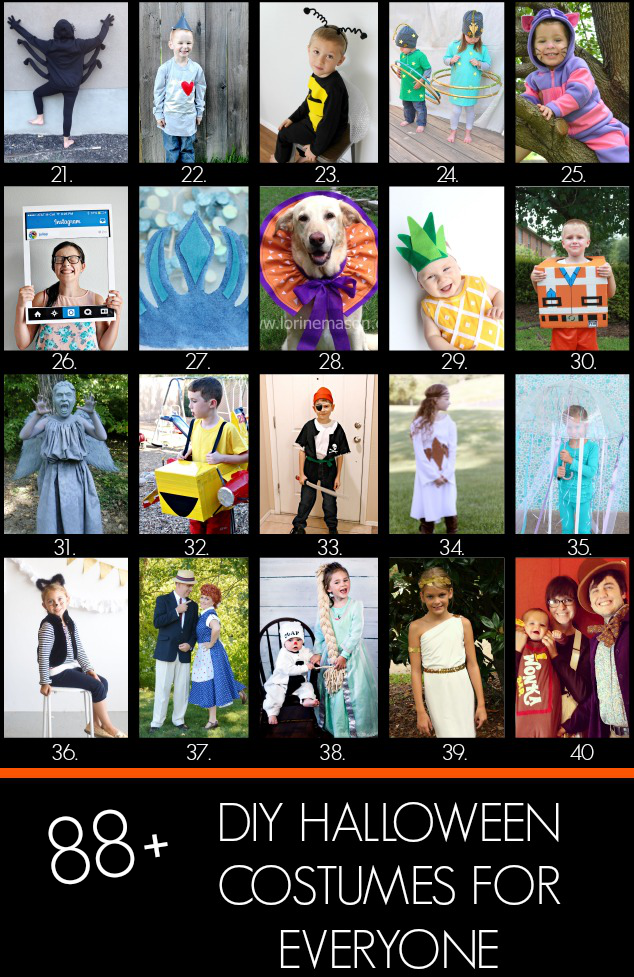
  88+ Handmade Halloween costumes at Creating Really Awesome Free Things

21. Cheap and Easy DIY Spider Costume 22. Easy Tin Man Costume 23. No Sew Bee Costume 24. Planet Halloween Costumes 25. DIY Cheshire Cat Costume 26. DIY Instagram Board 27. Elsa crown 28. Dog Collar Ruffles 29. DIY Pineapple Baby Costume 30. DIY Lego Movie Costume 31. Weeping Angel Costume 32. Disney Planes Costume: Dipper 33. Easy Pirate Costume 34. Easy Costume Idea - Renaissance Girl 35. 10 Minute Homemade Jellyfish Costume 36. DIY Cat Costume 37. Lucy And Ricky Costumes 38. Easy Frozen Costumes 39. Easy Greek Goddess Costume 40. DIY Family Willy Wonka Costumes
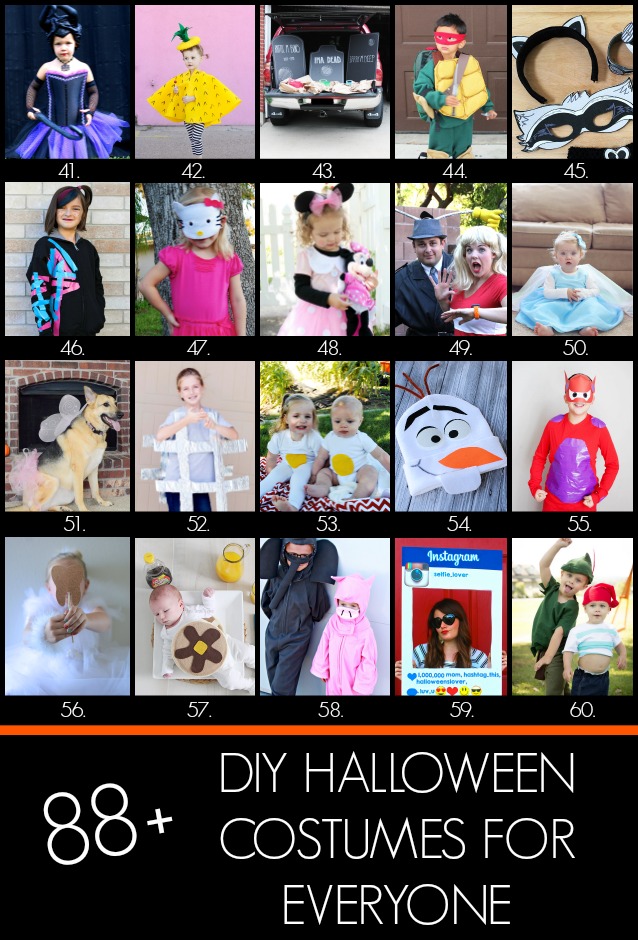
101+ Handmade Halloween costumes at Creating Really Awesome Free Things

41. DIY No Sew Maleficent Costume 42. No Sew Pineapple Halloween Costume 43. Graveyard Bean Bag Toss: Trunk or Treat Car Costume 44. DIY Teenage Mutant Ninja Turtles Costumes 45. DIY Raccoon Costume with Printable Mask 46. Easy WildStyle Lego Movie Costume 47. Simple Hello Kitty Costume 48. No Sew Minnie Mouse Costume 49. DIY Inspector Gadget and Penny Costumes 50. DIY Frozen Elsa Dress Baby Edition 51. Fairy Princess Dog Costume 52. DIY Hashtag Halloween Costume 53. Toddler or Baby Egg Costume 54. Easy No Sew Olaf Costume 55. DIY Baymax Costume 56. DIY Tooth Fairy Costume 57. Baby Short Stack Pancake Costume 58. Elephant and Piggie Halloween Costumes 59. Instagram Halloween Costume 60. Peter Pan & Mr. Smee Halloween Costume
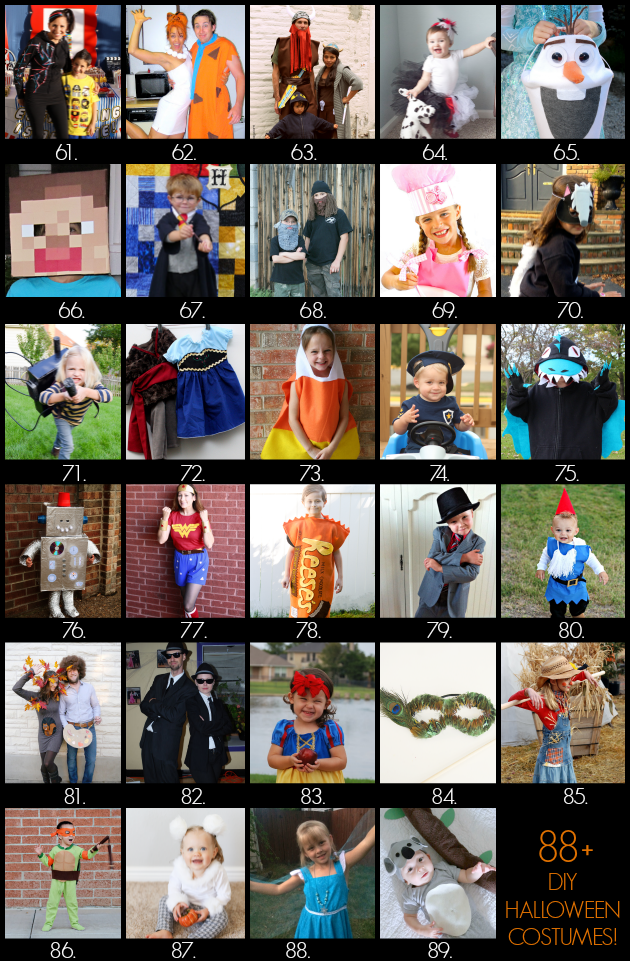
     88+ Handmade Halloween costumes at ReallyAwesomeCostumes.com

61. Wildstyle Costume from the Lego Movie 62. Fred and Wilma Couples Costume 63. Viking Family Costumes 64. DIY Cruella de Vil Costume for a child 65. Disney Frozen Olaf Halloween Treat Bucket 66. How to Make a Minecraft Steve Head 67. DIY Harry Potter Costume 68. DIY Duck Dynasty Costumes 69. No Sew Cupcake Baker Halloween Costume 70. DIY Skunk Mask 71. Ghostbusters Proton Pack DIY 72. Frozen Anna Costume Tutorial 73. Candy Corn Costume 74. Paw Patrol Halloween Costume 75. No Sew Toothless Dragon Costume 76. DIY Robot Costume 77. Wonder Woman Costume 78. Reese's Peanut Butter Cup Costume 79. Thrifted Gentleman Spy DIY Halloween Costume 80. DIY Boy Garden Gnome Costume 81. Group Costume: Bob Ross, Happy Tree, & Squirrel 82. DIY Blues Brothers Costumes 83. Snow White Costume 84. Peacock Princess Costume 85. Scarecrow Costume 86. Easy Teenage Mutant Ninja Turtle Costume 87. Handmade Teddy Bear Costume 88. Princess Elsa and the Spy Kid 89. DIY Baby Koala costume

HAPPY HALLOWEEN! I CAN'T WAIT TO SEE WHAT YOU CREATE!


xo

***************************************************

Here are more ghoulish delights from me!


***************************************************

Expecting a little boo soon? Buy a Maternity Countdown Shirt HERE!


Monday, June 2, 2014

Shadow Box Frame Makeover

Hello friends! Happy Monday! I hope everyone's weekend was amazing. We spent a lot of time with family, took Ava on her first pony ride {she LOVED IT!} and the best part? We found a home! A home we want to buy! And live in forever! It is amazing, and I had that "this is the one!" feeling while walking through it. I cried when we walked out to the backyard, because it felt like our home. We've just gone through so many homes that weren't going to work out and lost a couple from offers not working out, too, so going through this one was just the best experience. Cross your fingers they accept our offer!

Today, I've got a home decor DIY that would go great in a new home, an old home, an apartment and everything in-between! I originally shared this post on Belle of the Kitchen. At Target {of course} I found some discounted shadow box frames. The one in the picture below is super similar to the ones I bought, except the inside part was NEON YELLOW. Not that I don't love me some neon, but it wouldn't work with my home's color scheme. I decided to buy the frames anyway, since they were so cheap, and do a little burlap makeover to make it an interchangeable picture frame. Read on to see how easy it was!


You only need a few supplies for this fun project: Shadow Box Frame, Burlap {or other fabric of choice}, hot glue gun and a clip of some sort. That's it!

Tip: Craft stores often have great picture frames sales. Get the store's app on your phone for coupons, too!


There are only 3 steps!

Friday, May 30, 2014

DIY Coffee Filter Garland ... Guest Post by Laura of Lovely Wren

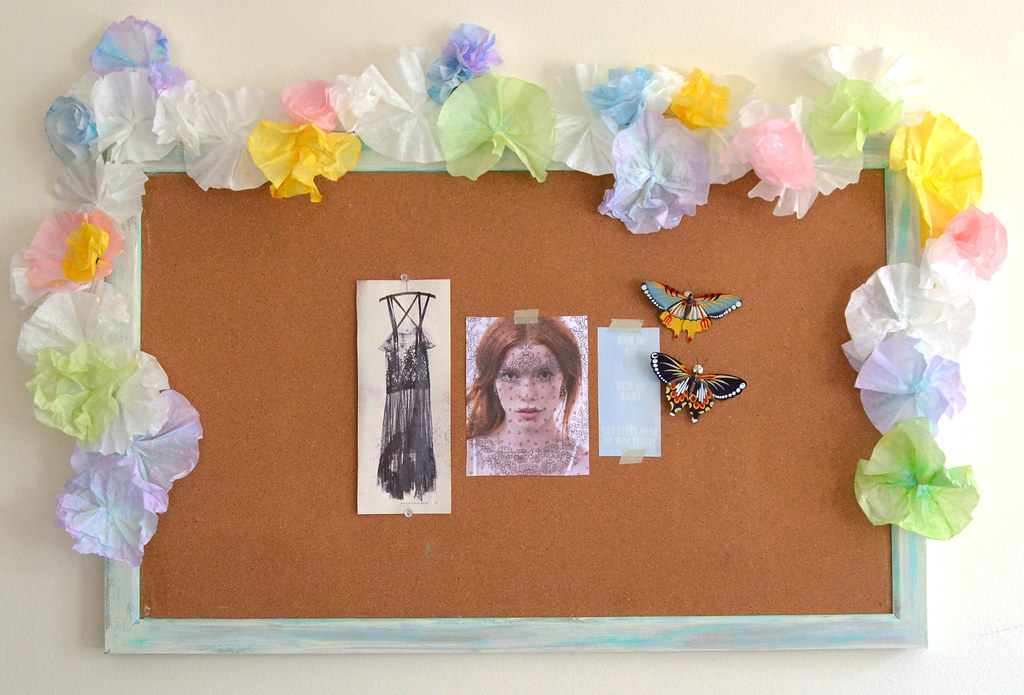
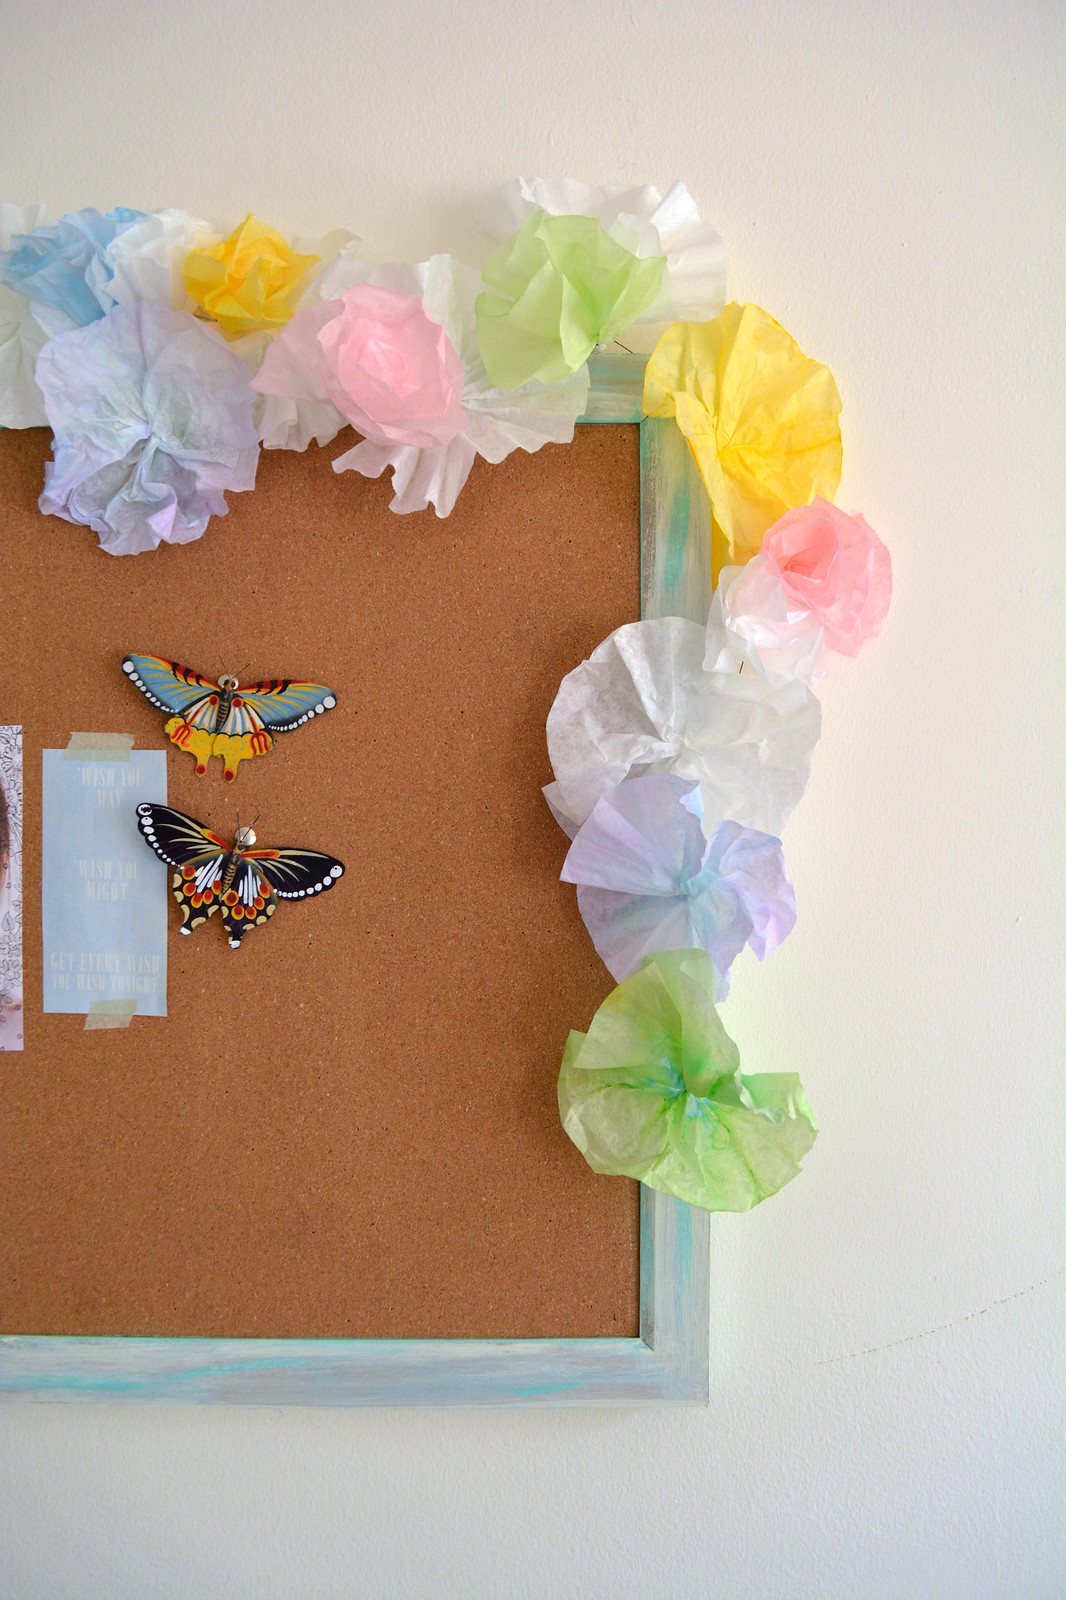
Hi Everyone! My name is Laura, and I blog about knitting, crafting and photography over at Lovely Wren. I've never done a blog swap before, so I'm thrilled to be trying it today for the first time. A big thanks to Daniela for having me :) I've come up with a sweet little DIY coffee filter flower garland to share with you today. It's somewhat time consuming, but easy to do, and gives you beautiful results! I made it to hang over my corkboard and brighten up my apartment, but it would also be great for birthday parties, baby showers, bridal showers, or just about any kind of party! 


Garland

GarlandCloseUp2new

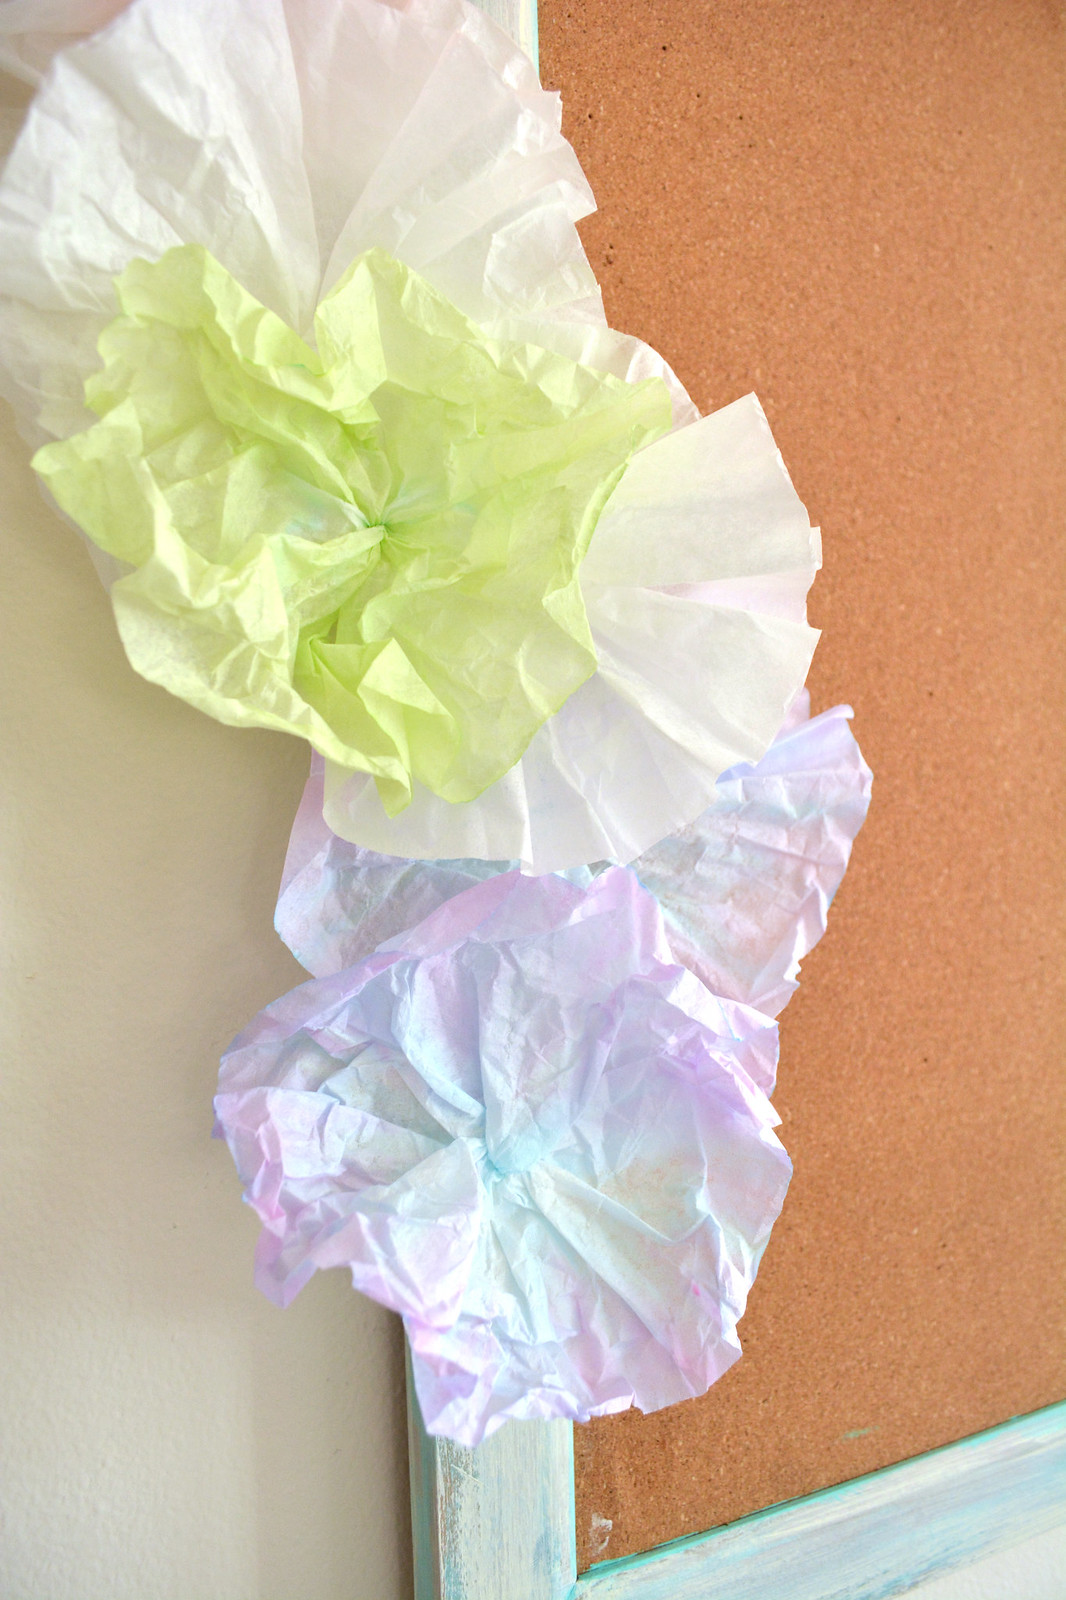
GarlandCloseUp

First I'll talk about dyeing the filters, then I'll show you how to make the different styles of flowers I used, and finally I'll tell you how to the garland together. Ready? Let's dive in! 

Saturday, April 26, 2014

Contributor Post at Pretty Providence - April

Today is very exciting, friends. Today is my very first contributor post - ever! Not just a guest post, but an actual C-O-N-T-R-I-B-U-T-O-R post, which means I'm a recurring lady on someone else's blog. I'm REALLY excited and kind of nervous at the same time. The blog is Pretty Providence.


I've followed Jessica and Sarah's blog for a while now, and really love it. Their style and tastes are super similar to mine. I've thought about being a contributor on another blog before, and have even been asked to be one, but I've never felt like the timing was right or found that one special blog that really fit ME and MY style. Pretty Providence does that to a 'T' - so when I read they were calling for contributors, I didn't even hesitate to apply. Jessica and Sarah were amazingly nice enough to love my blog and really want me to be a contributor! I'm just so excited to share my love of simple & easy crafts with others. I'll be posting once a month over there as a Fashion DIY contributor, and I'll give you all a reminder the day I do, so you can check out what I have to share!

Today, I am sharing a cheap & easy tutorial for making your own Anchor Tee. I just LOVE mine and wore it to SNAP! {a blog conference here in Salt Lake City}. I even got complimented on it from a huge blogger that I totally {heart}, so it kind of made my day. I hope you'll visit Pretty Providence and check out my first contributor post {there may even be a FREE PRINTABLE for you!}. Have the best day!

DIY Anchor Tee at Pretty Providence


xo


I hope you'll stop by my link party and link up at Link'n Blogs before you go! Click > HERE <

Also, you can enter to win Ad Space for your blog on MY blog for the month of May!


Wednesday, March 26, 2014

Hand Painted Burlap Coasters

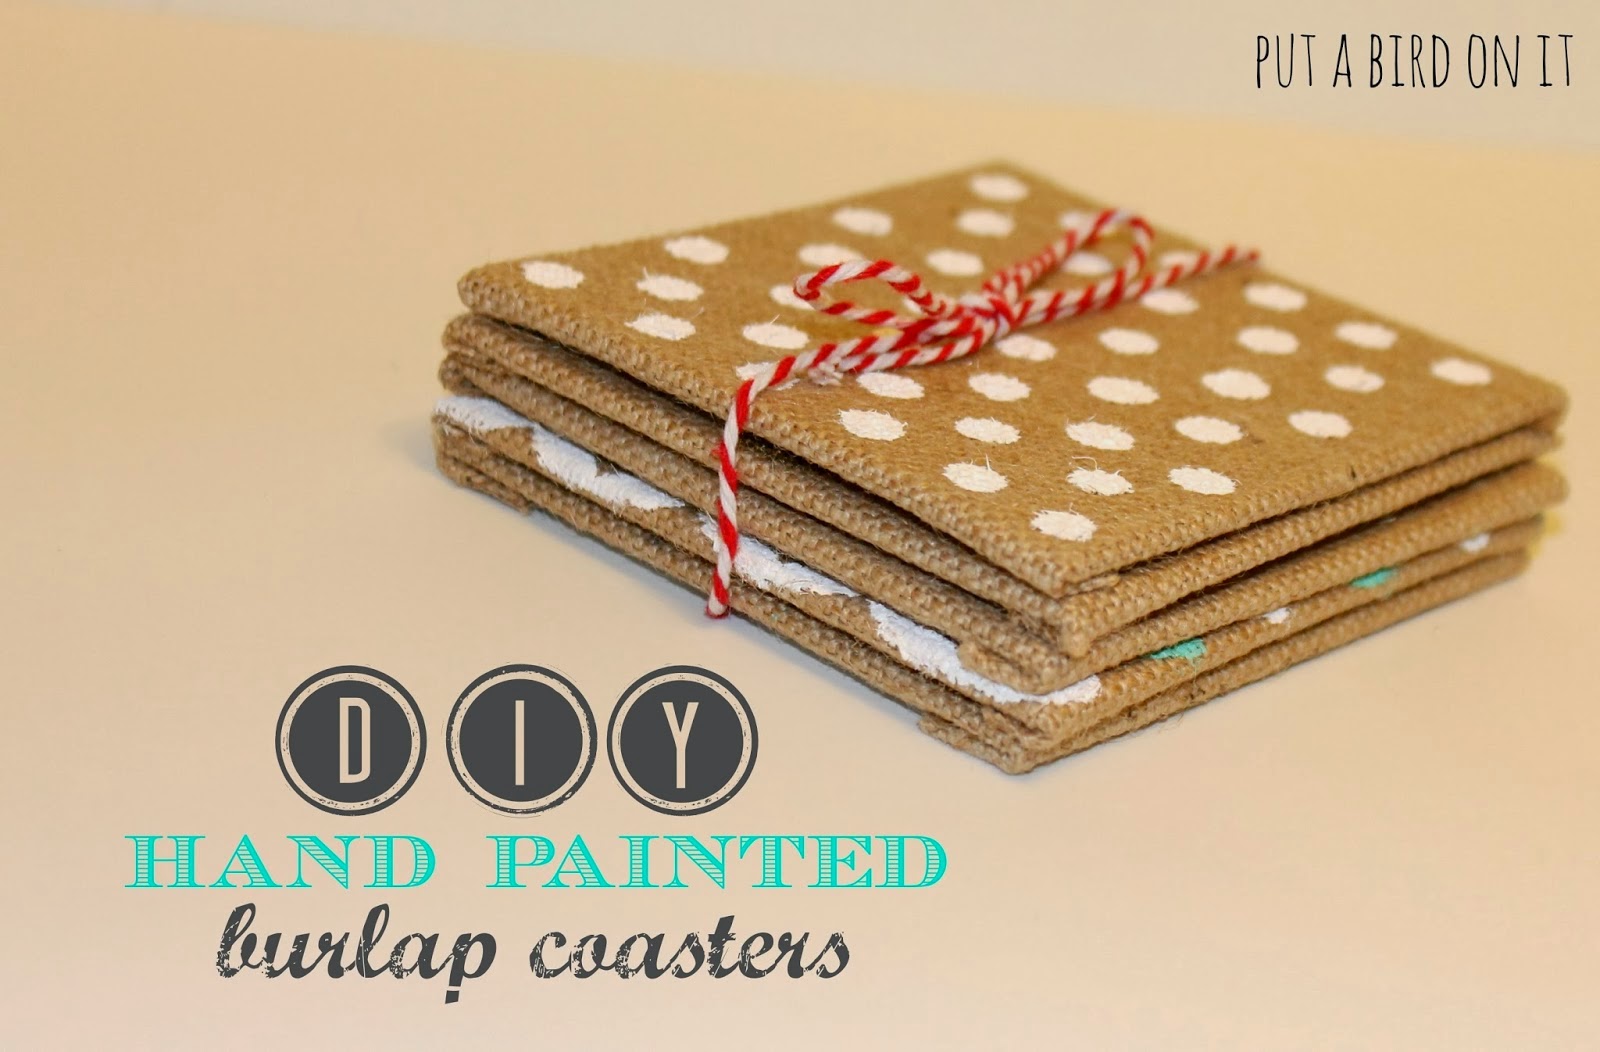
Happy Wednesday! Today, I'm sharing a project I originally guest posted on Newly Mynted. I just LOVE burlap and found these burlap squares at Michael's for pretty cheap. My mind immediately went to "COASTERS!" These were fun to make - you can use any color of paint and customize them however you want. They'd be adorable as a personalized wedding gift or housewarming gift, too.


Supplies
Burlap squares
Acrylic paint
Foam pouncers | Q-tips | Foam brush {whatever you want!}
Acrylic sealer {not pictured}


This is the fun part! Decorate your coasters however you please. You can use a stencil, but I just painted by hand my designs. I think using a vinyl stencil in the future would be fun.

Monday, March 24, 2014

DIY Polka Dot Pants

We've all seen them. An adorby pair of polka dot pants in your fave store just hanging there saying "Buy Me" - "Buy Me". The other part we also see? The price tag. OUCH! Keeping up with the latest trends can get pricey pricey these days. BUT. Thankfully. There is a way to get your polka on (literally) without breaking the bank. Three little letters: D-I-Y. It doesn't get much simpler than polka dot pants. You only need 3 ingredients: pants, fabric paint & foam pouncer. Read on, my friends. Read on.


I went to Deseret Industries ("D.I." - as we call it - a LDS thrift store) and bought a pair of used skinny jeans for $3. One time through the wash and they are good as new.


You can buy fabric paint, or make your own. I always opt for making my own. SO cheap and easy to make just a little for your current project. Buy a fabric medium and mix 2 parts paint with 1 part medium. I use a couple cupcake liners stacked to mix my paint. That way, I can toss it when I'm done.

Monday, March 3, 2014

DIY His & Hers Sharpie Mugs

This week is different than a normal week here at Put A Bird On It. Saturday, March 8, is my anniversary! 6 years! What an incredible 6 years it has been.

Salt Lake LDS Temple
Because I love LOVE so much {I really do - I did a giveaway dedicated to it!} - everything this week will be about LOVE and MARRIAGE! Including a special post about my marriage on Friday. I've never done a "theme" week, so I'm excited to do something new. 

To start off Marriage Week, I have an awesome {and duh EASY} tutorial for you that is ALL about a HIS and a HER. I had so much fun seeing how much everyone loved my West Elm Inspired Sharpie Mugs that I wanted to make another version. I created a funky set of His & Hers Sharpie Mugs. Snuggle up by the fire, put on your favorite Star Wars movie and sip some hot cocoa with these duo mugs. 


One of my very first memories of being married was our first morning in our home. I made us breakfast! Ha ha, those were "the days" ... me cooking ... but, really, I did. All I can remember is that toast was involved. But we sat, just the two of us, at our little yellow hand-me-down table, with our green IKEA dishes, in our 1920 little yellow house, and we ate breakfast together. It's one of our favorite memories. And I sure wish we'd had these mugs at that breakfast. How fun would that have been?!

the how-to

Saturday, March 1, 2014

DIY Home Remedy for Acne ... Guest Post by Lauryn of Ambiguously Me

Hey there, Lovers! Lauryn here from Ambiguously Me.
Daniela is the cutest and asked me to guest post on Put A Bird On It
(psssst- stay tuned for a guest post from her on my blog!)

Well if you are anything like me, this winter is making my skin crazy!
All the dry air and cold is a recipe for disaster.
I of course have tons of face products at home
some of those including moisturizer and my Clarisonic,
but i am always going for more at-home treatments.
Making your own cleansers and masks at home
can be a relief knowing exactly what products are going into the mixture.
pampering your skin doesn't need to be expensive, or scary!
I made a quick go-to chart for 5 easy to do (only 2 steps!) recipes.
Have at em ladies!


Don't forget to moisturize after doing any of these at-home facials.
Many may think that moisturizing will cause more oil, leading to more acne.

Tuesday, February 18, 2014

DIY Gold Dipped Candles ... Guest Post by Katelyn from Learning, Creating, Living

Hello everyone, I'm so excited to be here at Put A Bird On It! Daniela is one of my very good blogger friends & I was so thrilled when she asked me to guest post on her blog. My name is Katelyn and I blog over at Learning Creating Living, where you can find easy & inexpensive diy projects, fun crafts & tasty recipes. Today I'd like to share with you a simple & easy diy project.


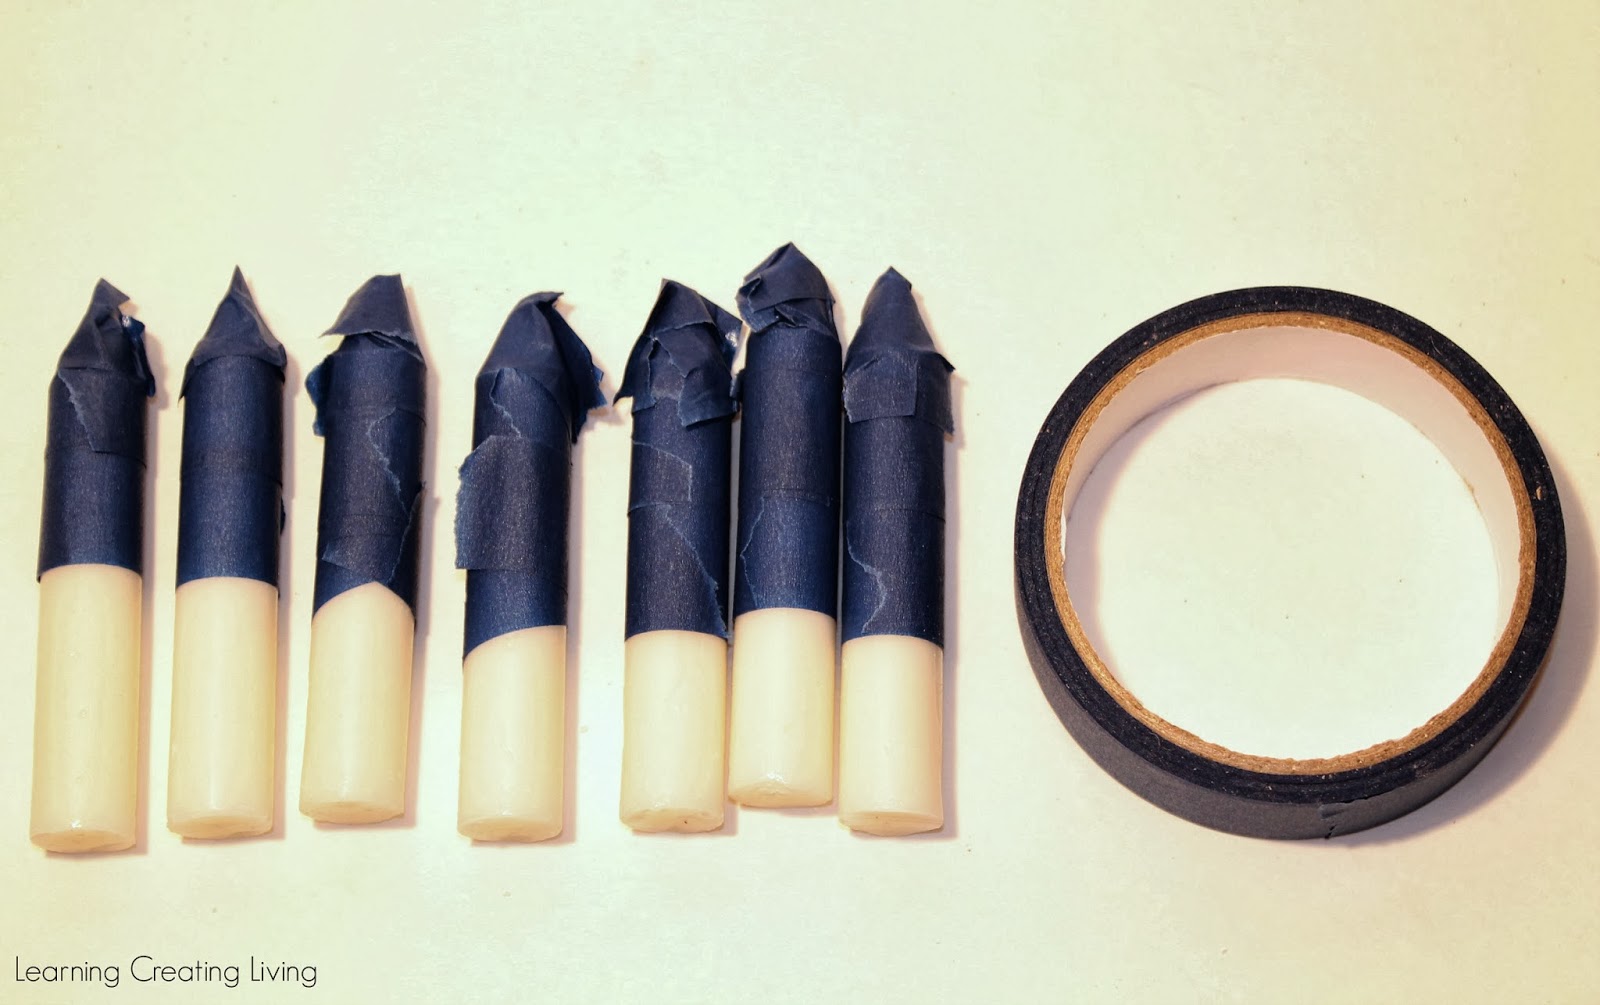
I purchased a package of emergency candles at the Dollar Tree. The package came with seven candles but sadly one broke in the making, who likes an odd number anyways? ;) I then used painters tape and taped the part of the candles I didn't want gold.


Tuesday, February 11, 2014

DIY Glitter & Gold Heart Sleeves made with Homemade Fabric Paint ... And A Silhouette Studio Tutorial


I am SO EXCITED about this tutorial. I've been anxiously waiting to post it, because it is one of my most favorites ever, and I've been wearing this cardi every day for five days. Yep. I am quite obsessed with gold + sparkles right now. Plus, add HEARTS on top of that, and you can safely use #SWOON. I love the look of elbow patches, but girl can't sew, so I had to  come up with a different way to get the look. I decided to use homemade fabric paint {I have a tutorial for making your own fabric paint - check it out HERE}. I absolutely love making my own fabric paint. It is SO inexpensive, and I never seem to run out. I used acrylic GLITTER paint for the first time. I was nervous, because I didn't know if it would work well as a fabric paint. I was over the moon happy with the results. The glitter paint worked out beautifully.

This project was SO EASY, I can't stress the EASY factor enough here. I made it in about 20 minutes the night before Build Your Blog Conference, because I wanted to wear this cute cardigan to the conference. I definitely wore my heart on my sleeve that day. :)


Here's what you'll need to make your own cute heart-on-my-sleeve shirt:


The Goods

Shirt {I used a cute cardi I got on sale at Target}
Heart Stencil {I cut mine out of vinyl using my Silhouette Cameo}
Fabric Paint {2 parts acrylic paint + 1 part fabric medium}
Foam Brush

Here is the tutorial for making a stencil using a Silhouette Cameo. I just LOVE my Cameo, guys. I use it almost every day. It's rare for me to make a project without using it in some way. I thought it'd be helpful to show how to make a heart stencil out of vinyl using the Cameo and designing it in Silhouette Studio. If you don't have a Cameo {yet!}, you can skip this part and go to the next part about painting on your shirt. You can make a stencil out of freezer paper or buy a heart stencil from the store. After seeing how easy it is with a Cameo, though, you might be headed out to get one for yourself.


*I know it seems like a lot of photos, but I swear it is SO easy. Don't let the photos scare you - I just like taking photos, ok?! ;)

Tuesday, February 4, 2014

DIY Monogram Business Card Holder ... Guest Post by Stephanie of Newly Mynted

Hello Bird readers!

What a joy to be trading spaces with Daniela today. When you're done here, head over to NewlyMynted to see what she's got for you. It's like Two for the Price of One awesomeness!

With Valentines Day just around the corner, many of us are trying to decide what to get our significant others. For me, this is a real challenge. My honey, Logan, is a computer technician, so getting him anything related to computers is out of the question. I know how to use mine, but don't ask me about the mechanics behind it. He does, however, love it when I make him things! And if there's one thing men certainly appreciate, it's a practical gift. With that, it became a question of what gift DIY gift for men could I create? Recently Logan was promoted to management and received business cards with his name on them. Yeah, I'm a little proud of him!

Supplies:
Leather or other fabric
Pelon fusible interfacing
Sewing machine
Sizzix Big Shot & embossing folder (optional)
Computer
Xacto knife
Martha Stewart acrylic paints: Wedding Cake and Gold
Sponge brush
Fine tip paintbrush


Cut your main fabric and interfacing as follows:
Main 4" x 4 3/4"
Pockets (x2) 4" x 2 1/4"

NOTE: FITS STANDARD 3.5" X 2" SIZE BUSINESS CARDS

Trim your interfacing down 1/4" on all pieces and iron onto the back of each of piece of fabric. You can ignore my coffee stains. Being an avid DIY'er and coffee drinker has its set backs.

This is where things get exciting. Logan got me this pretty little number for Christmas, and imagine my surprise when I found out you can emboss fabric. You heard me right, You Can Emboss Fabric! Yes I squealed! To keep this masculine, I went with a simple quarter foil embossing folder I picked up at Michael's. Run it through according to your machine's directions, and revel in the sheer awesomeness of this discovery. Is that not one of the neatest things you've done in all your crafty days?!
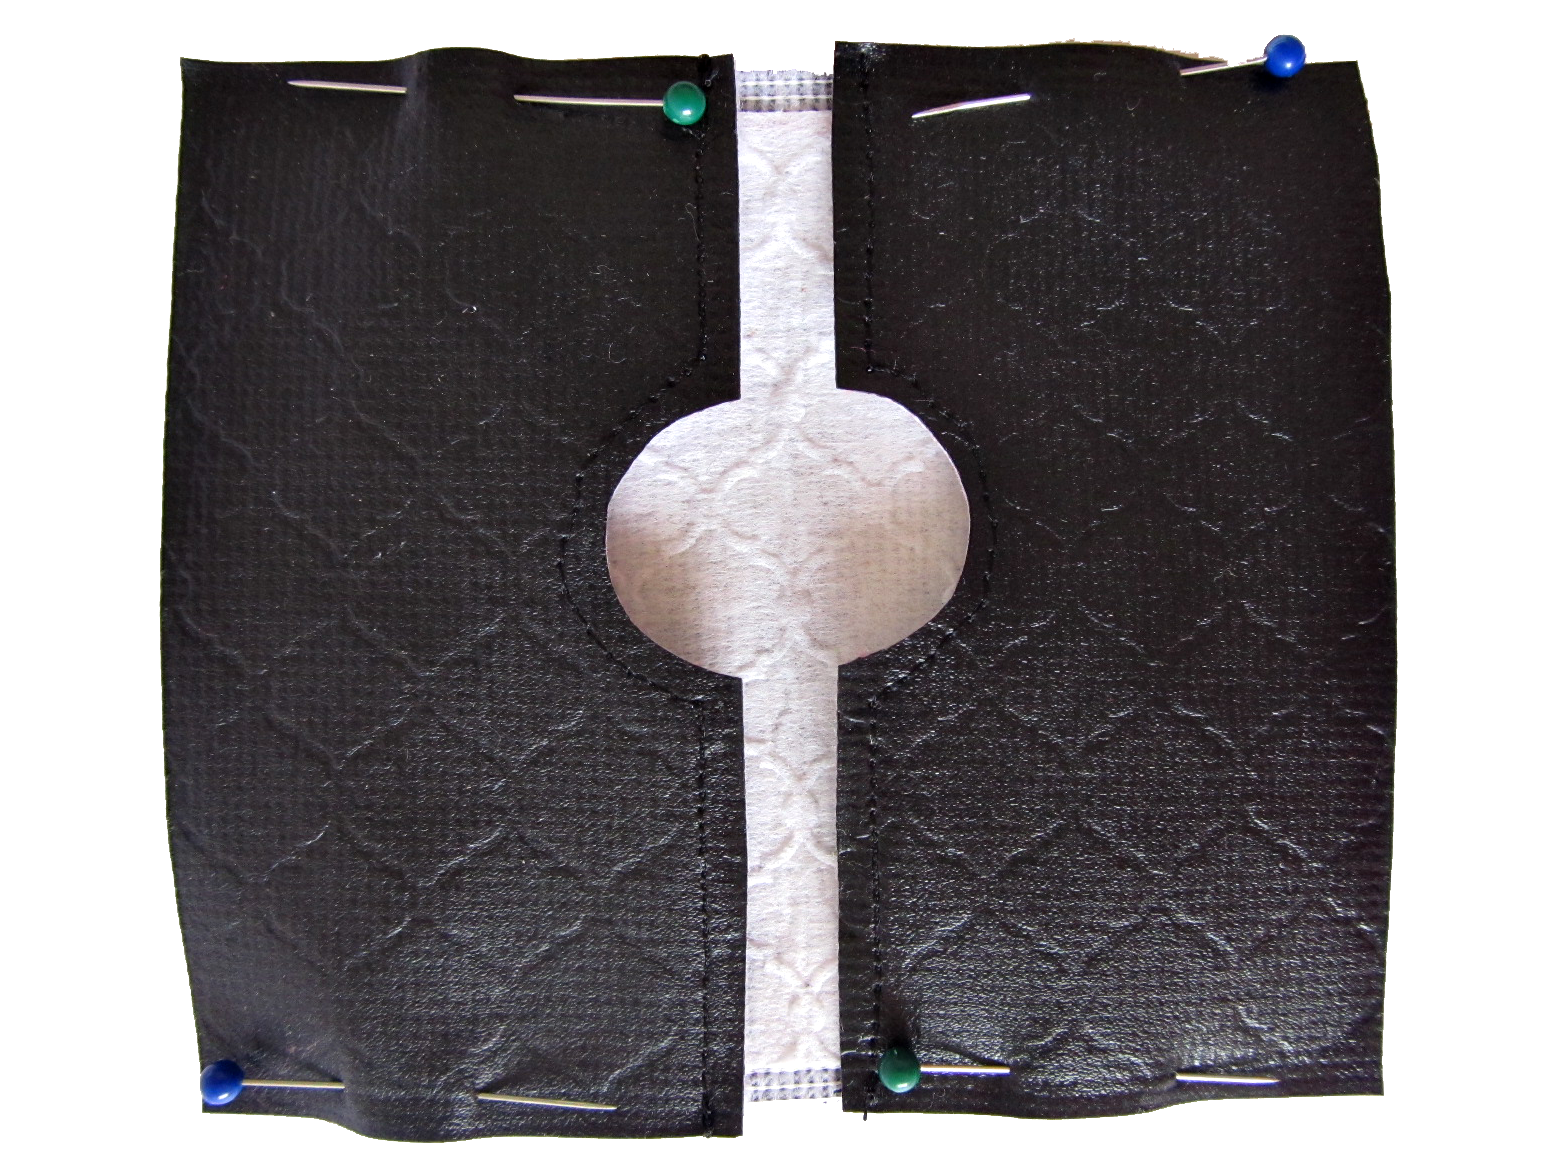
Using a quarter (or other small round object), trace a half circle and cut it out of each of your pockets. This will create a little thumb hole to make it easy to pull a card out. My advice, though, be smart and measure the center of your pockets. I did it the lazy way and eyeballed it, and my cut-outs didn't come out centered. Oh well. There is no room for perfection in creativity, am I right?
With a long straight stitch, sew across the top of each pocket first with a 1/4" seam. Since this is a leather fabric that won't fray I left my seams exposed.
Pin the pockets to the main fabric wrong sides together and sew around all four sides, also with a 1/4" seam. 

Open a Word document and select what monogram font you want. I used Go to the Sky, but here is a great selection of many more. Make sure your document's zoom is set at 100% so you can get an exact size of what it will look like when you print it out. Mine was 1 1/4". Once it's printed, use your Xacto knife and cut away the negative space.

Tape the stencil you just made to the front of the card holder and paint. Be sure to dab only in up and down motions. If you turn your sponge to the side, paint will get shoved underneath and your lines will become uneven. Two coats is best, but if you're like me and lack the patience to wait an hour between coats, break out your hair dryer. It's a multipurpose tool!

With your fine tip paintbrush, line your letters in white and dry again. And that's all. In an hour you now have a custom Valentine's gift for him. I can't wait for the 14th to come around to give him this. Last year I made him a leather Bible cover and he adores it. It brings him so much joy to show off the things I take the time to make for him.

Thanks for having me, Daniela! I would love to hear from each of you:

*********************************

Ok - are you as impressed with Stephanie's tutorial as I am? Who wouldn't enjoy receiving that gift? I hope my husband doesn't read this -- he will be super jealous, ha ha. Thanks to Stephanie for visiting! Like she mentioned earlier, I am over at Newly Mynted sharing a tutorial for DIY Coasters, but not the typical photo or tile kinds. Be sure to head over there {click here!} to see what I used to make my hand painted ones {spoiler alert: it might include a lot of burlap!}.

xo


Are you on Pinterest? I'd love to follow you! Leave me a blog comment with your Pinterest link and gain at least one new follower {aka ME!}.

You can follow my Pinterest boards here:

Saturday, January 11, 2014

West Elm Inspired Sharpie Mugs

Hi friends! I had the pleasure of guest posting at Polish & Pipsqueaks a couple weeks ago. I shared my West Elm Inspired Sharpie Mugs! Everyone has been so sweet with their responses. In case you missed my guest post, I'm sharing the tutorial here on my blog, so you can get in on the knock off action. I hope you find some DIY inspiration here!


Today, I am sharing with you my favorite project to date. West Elm Inspired Sharpie Mugs! I've been eyeing these West Elm polka dot mugs forever. I'm a sucker for anything with polka dots! But they are pricey -- especially if you want more than one. I have a super inexpensive and easy DIY project that gets you the polka dot mug of your dreams and lets you keep that cash in your piggy bank. Here at Put A Bird On It, I am all about using stuff you already have at home -- or can get on the cheap -- and turning into a Pinterest worthy item. And sharpie mugs are exactly that! 


 Here's what you'll need:

The Goods
Ceramic mug
Sharpie
Oven
yep - that's it!
The Fun Part
Clean your mug. I just wash it with soap and water, but I've heard rubbing alcohol works well, too. Time for the fun! Draw your design on your mug. Write a phrase, draw a picture, put your name, draw one of the Hemsworth brothers -- whatever you want! I sketched my words out on a piece of paper first, so I had a battle plan in place before drawing on my mug. The last step is baking your mug. You'll bake it at 350degrees for 30 minutes. Place the mug in the oven during preheat. After the 30 minutes, turn the oven off and let your mug cool completely in the oven. This will help prevent cracking. You're done!
{ Tips}
{The cheaper the mug -- the better! You don't want a thick, shiny glaze on your mug, so head to your local dollar store or Walmart.}
{If you are nervous about your design fading or chipping, use an oil based Sharpie. You can also get oil based paints from a craft store. I wanted cheap -- so I used a 3-pack of metallic Sharpies from Target. They worked just fine!}

This mug was so easy -- I made a second one with my "phrase" for 2014. CHOOSE HAPPY.


If you make your own Sharpie Mug, link it up here. I'd love to see what designs YOU come up with!

xo

**BUY A MATERNITY COUNTDOWN SHIRT HERE!**


************************************************

Enter the fab giveaways I'm currently hosting!

Don't forget - today is your LAST DAY to enter to win a free family pass to Baby Animal Days in Utah this weekend! Enter > HERE <

Also, I am giving away a $550 Amazon gift card with some other great bloggers! Enter > HERE <


************************************************

Check out Pick Your Plum for today's daily deal!

Blog Design By Brand Me Beautiful